 BE VOICE
Your phone system
Set up a phone menu (press 1 for…)
A menu plays a recording, such as "For a new job press 1, for accounts press 2", and sends the caller where the key they press says. You make the menu once on the IVR menus tab, then connect its keys on the routing canvas.
Before you start: your recording
Callers hear a recording you provide: you, a staff member or a voice artist reading the choices. Make it short and say the choices in the same order as the keys, for example:
"Thanks for calling Harbour Plumbing. For a new job or a booking, press 1. For accounts, press 2. If you have a burst pipe or an emergency, press 3."
Save it as an MP3 or WAV file, up to 20 MB. You can upload it while you create the menu, or beforehand on the Music on hold tab (see Music on hold). It's converted and levelled for phone calls when you upload it.
How to create a menu
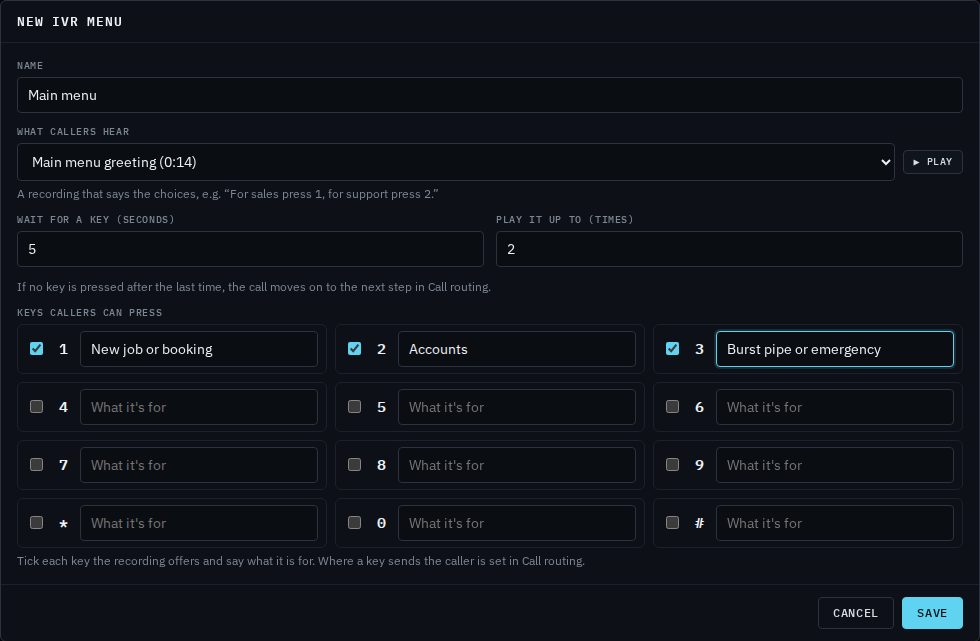
- Open IVR menus → + New menu.
- Give it a Name, such as "Main menu".
- Under What callers hear, choose your recording. To add a new one, choose Upload a recording…, give it a Recording name, choose the Audio file and tick to confirm it's your own recording or you have the rights to play it. ▶ Play lets you listen first.
- Set Wait for a key (seconds) and Play it up to (times), or leave them empty for 5 seconds and 2 times.
- Under Keys callers can press, tick each key your recording offers and type what it's for in the box next to it. Typing a label ticks the key for you.
- Click Save.
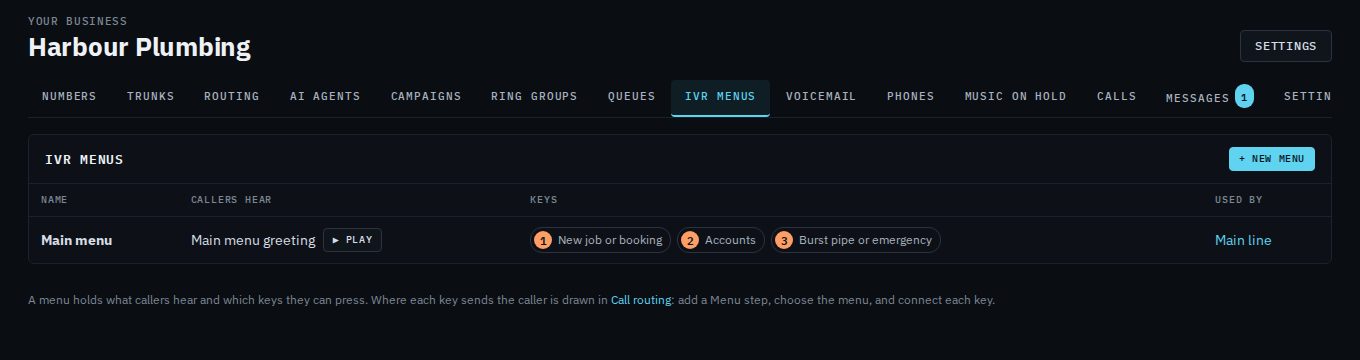
The menu isn't used by any calls yet. The next step is to put it in your routing.
How to connect the keys on the canvas
- Open Routing.
- Drag Menu onto the canvas and connect it where callers should hear it, for example from your open-hours rule.
- Click the menu box and choose your menu under Menu. The box grows a dot for each key: Press 1 New job or booking, Press 2 Accounts and so on.
- Drag from each key's dot to where that key goes. Drop it on empty space to add a new step right there.
- Drag from the last dot, No key, or not answered, to where callers go if they press nothing.
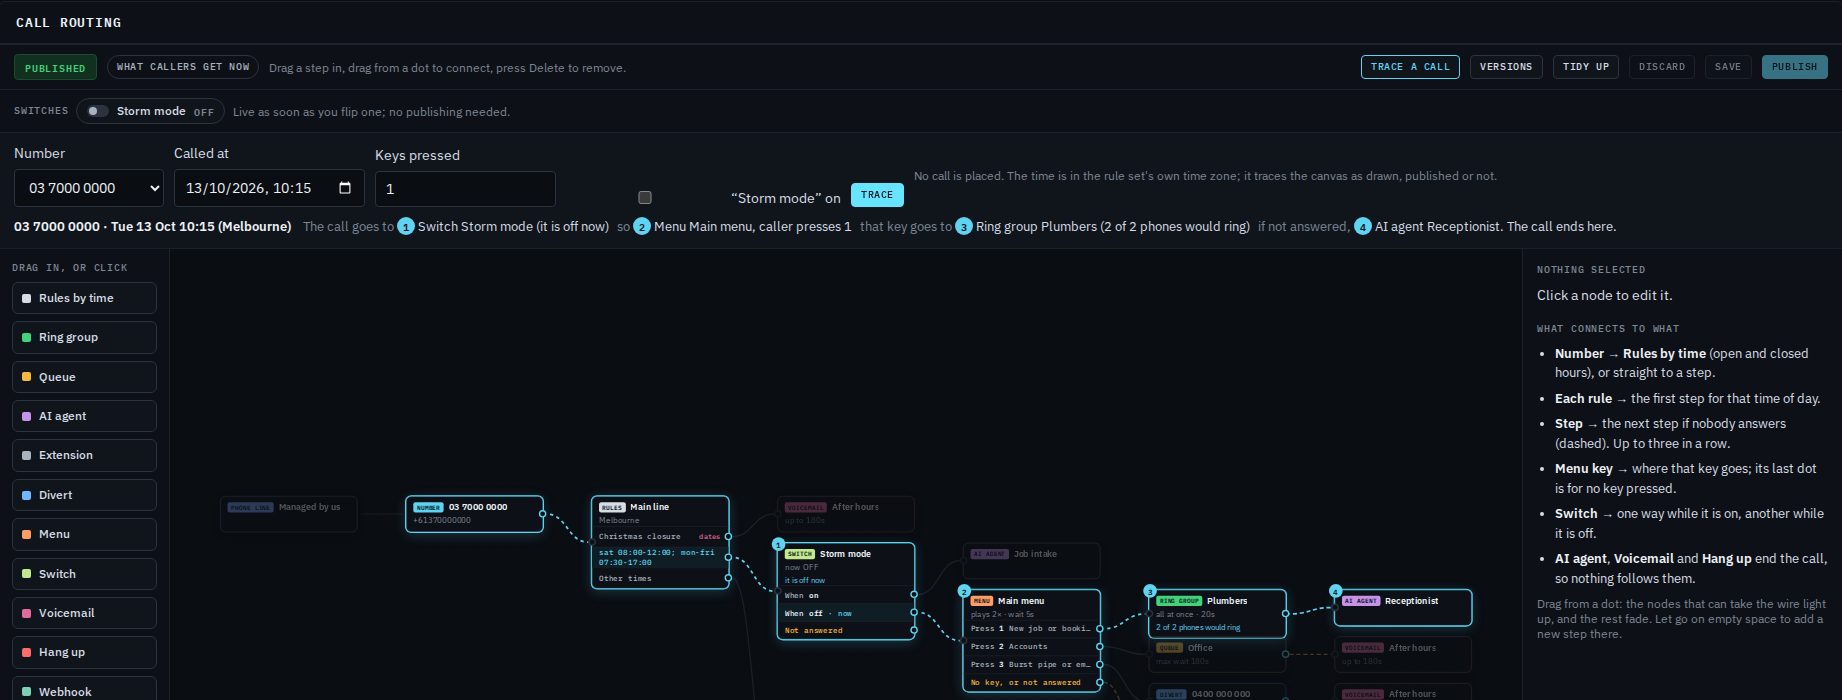
- Trace a call with a key in Keys pressed, then Publish.
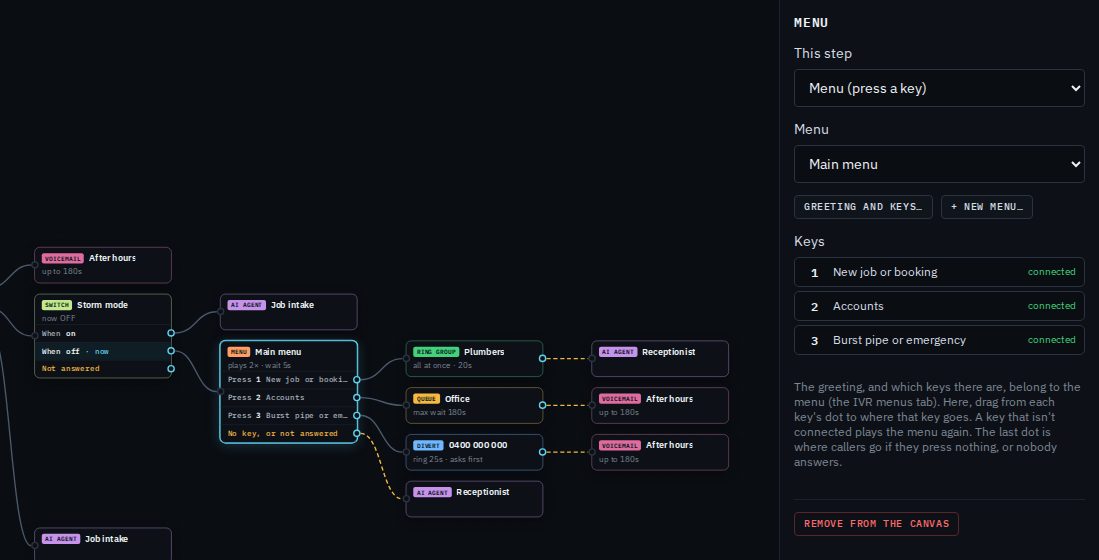
Each key can lead to up to three steps in a row, joined by dashed "if nobody answers" wires. Harbour Plumbing's menu:
- 1 New job or booking: ring the Plumbers group for 20 seconds; if nobody answers, the Receptionist AI agent.
- 2 Accounts: the Office queue; if nobody answers in time, the After hours voicemail.
- 3 Burst pipe or emergency: divert to the on-call mobile, 0400 000 000, asking first; if they can't take it, voicemail.
- No key: the Receptionist AI agent.
Options explained
- What callers hear
- The recording that says the choices. Pick from Your recordings (what your business uploaded) or the BE library, or upload a new one.
- Wait for a key (seconds)
- How long to wait for a key after the recording ends: 2 to 30 seconds. Default 5.
- Play it up to (times)
- How many times the recording plays if no key is pressed: 1 to 5. Default 2. After the last time, the call follows the No key, or not answered dot.
- Keys callers can press
- Any of 0 to 9, * and #. The label (what it's for) is shown on the canvas and in the list, so it's easy to wire the right key.
- Used by
- When you edit a menu, which call routing uses it.
What callers get
- A key that's connected sends the caller down its steps. If none of those steps answers, the call follows the No key, or not answered dot.
- A key the menu offers but that isn't connected yet plays the menu again. The canvas and the IVR menus list point these out ("key 4 not connected").
- No key at all, after the last play: the No key, or not answered dot.
Changing or deleting a menu
Click a menu in the IVR menus list, or click Greeting and keys… in the canvas side panel. A new recording, wait time or key label applies from the next call, with no publishing. If you add a key, connect it on the canvas and publish.
Delete menu is at the bottom of the menu's window. A menu that your live call routing uses can't be deleted: take it out of the routing and publish first.